A few people have also asked about the K&N filter, and how difficult the install was. In a nut shell, it was very, very easy, and with a little work, this could be done without buying the kit from Japan.
You can domestically get the filter, it is
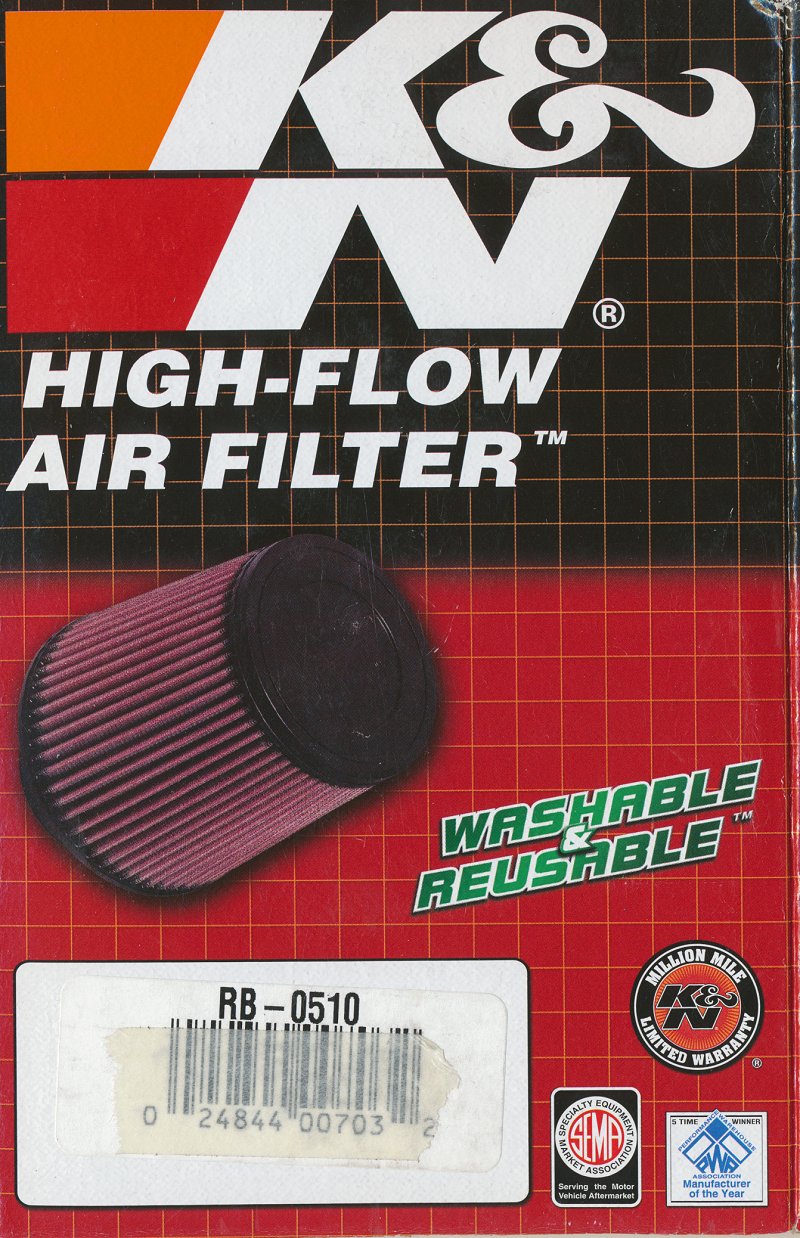
K&N #RB-0510. Then you just need to find a ring for the filter to clamp to. I bet you could use a piece of steel pipe of the right diameter and thickness, cut down to a ring with a saw. See the instruction sheet after the cut.
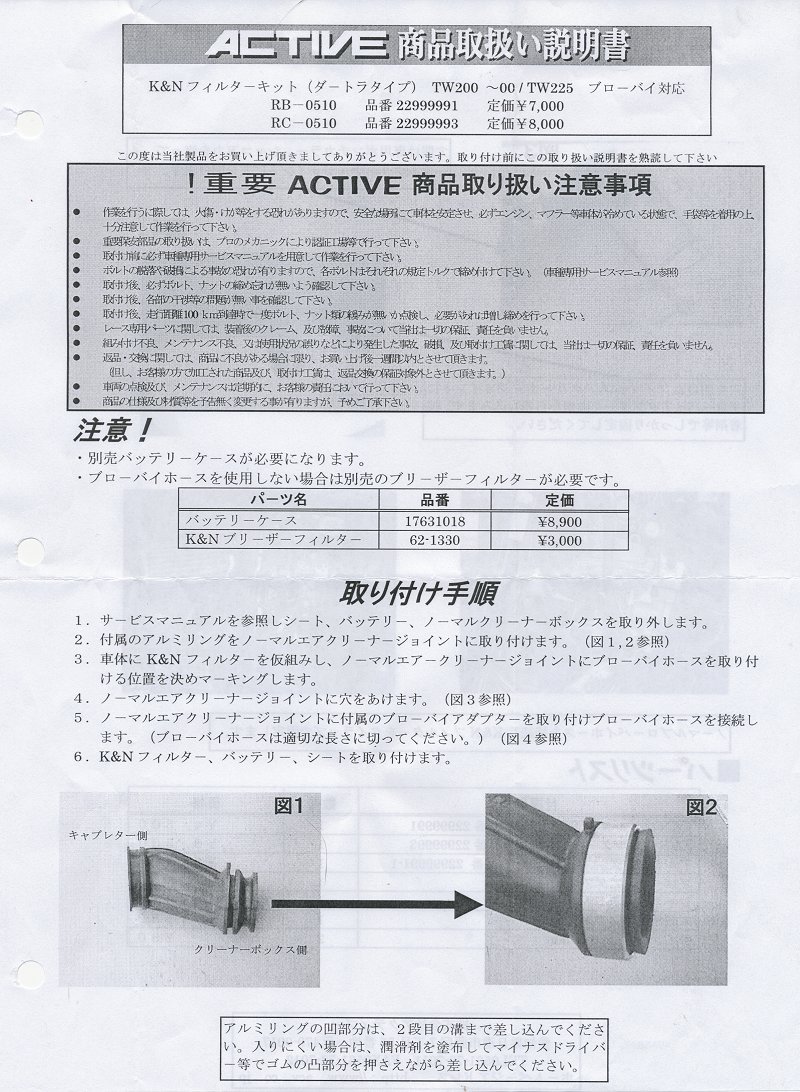 |
| Here the instructions descibe pulling off the stock airbox tube from your stock airbox. It is held in place with some rubber cement and comes out with just a little persuasion. In picture 2 you can see the supplied metal ring that comes with the kit. This is slipped over the end of the tube and is there for no reason other than to give the filter's hose clamp something to tighten down to. |
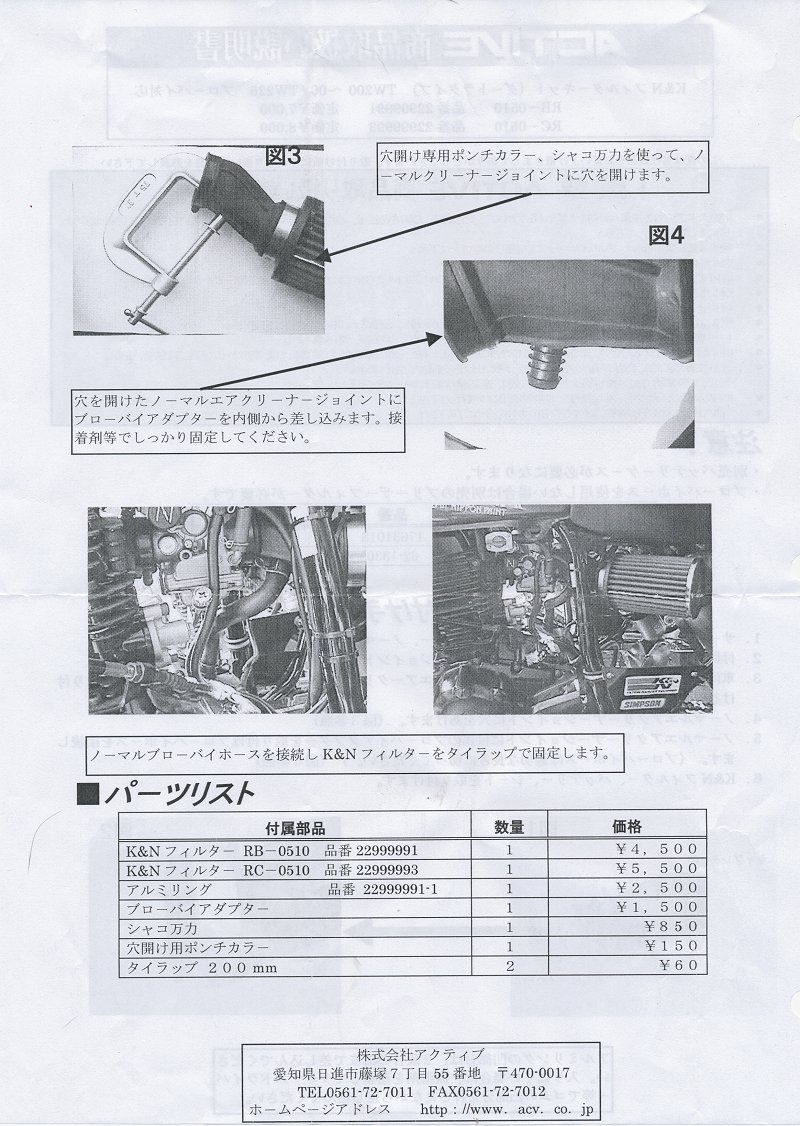 |
| The kit also comes with a cheap C-clamp and a metal "punch" which is nothing more than a thin metal tube of the right diameter. So you just pick a spot on the bottom of the tube, and use the clamp and the metal tube to punch a clean hole through the rubber. In picture 4 you see the plastic nipple that is also supplied with the kit. This nipple will fit nicely in the correctly made hole, and then you can push your breather tube from the stock airbox onto this nipple. Then it is just a matter of mounting the filter, and you are done. Don't forget you might need to rejet your carb once done, and if you are like me, you will make some sort of hanger for the filter (see post here http://osakacustomstyle.blogspot.com/2012/12/finished-home-made-filter-hanger.html). |

What is the purpose of punching the hole through the rubber tube?
ReplyDeleteThere is a breather hose that goes into the rubber there and down into the crankcase.
Delete